Our website will be undergoing essential maintenance today at 1:30AM EST and will be unavailable for up to 1 hour.

My Digital Planning Blog

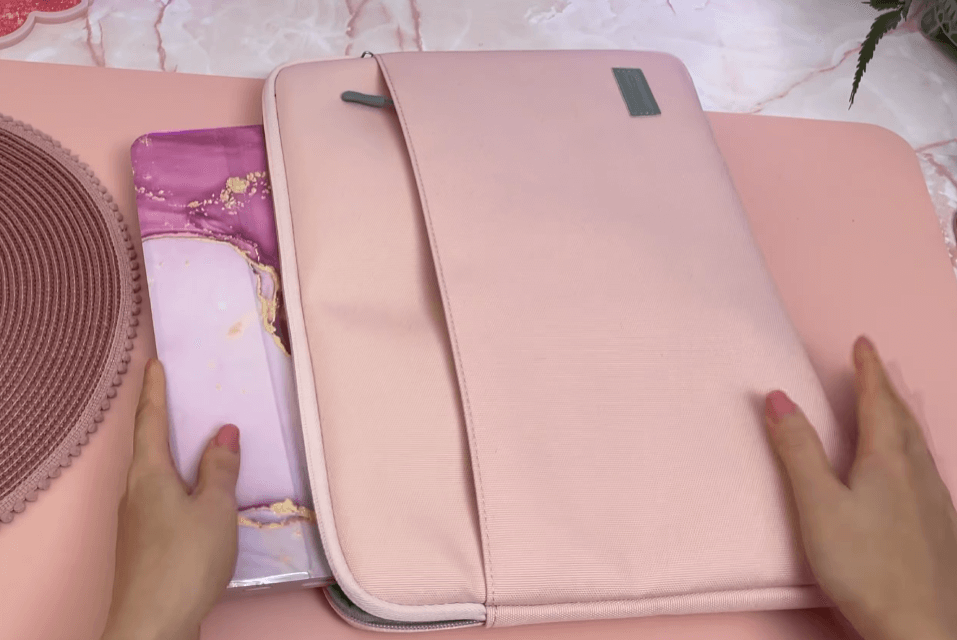
Spring Digital Plan With Me

Today I’m digitally planning on my iPad using the GoodNotes app. I’m planning for the month ahead and will be doing a spring theme. I’m using the green digital planner from the regular planner bundle. This isn’t the rainbow planner I normally use and the reason is that I want to do a spring-themed spread and I think this planner design is better suited for that.

I show in the video how I’m make the image into an overlay sticker in the Procreate app, and I’ve now added it to my freebies vault

To give a quick overview, I made a silhouette of my page, which I put underneath the image I wanted to use and then I created a clipping mask of the top layer. I turned off the background layer and merged the other layers together then after a few adjustments to the saturation and transparency, I saved the finished sticker as a PNG.

Back in GoodNotes, I added the sticker onto my page, and it fit perfectly around the rings so I’m delighted with how this turned out. It’s semi-transparent, so you can still see the planner underneath, and you don’t have to have cutouts for the rings but I just think it looks neater this way.

Here in the UK, we’re starting to see the first signs of spring so I’m going to be using my spring sticker pack, which is one of my favorites. I think the colors in this pack go really well with the overlay sticker.

I was going to decorate two blank boxes with a banner sticker but then I went with a colorful word sticker instead and I handwrote the same word again over the top in a script style to create this font overlay effect, which I really like.

Next, I’m adding in the upcoming holidays this month and I’m actually working on a new holiday sticker pack, which has been such a joy to create, and it’s now been released.

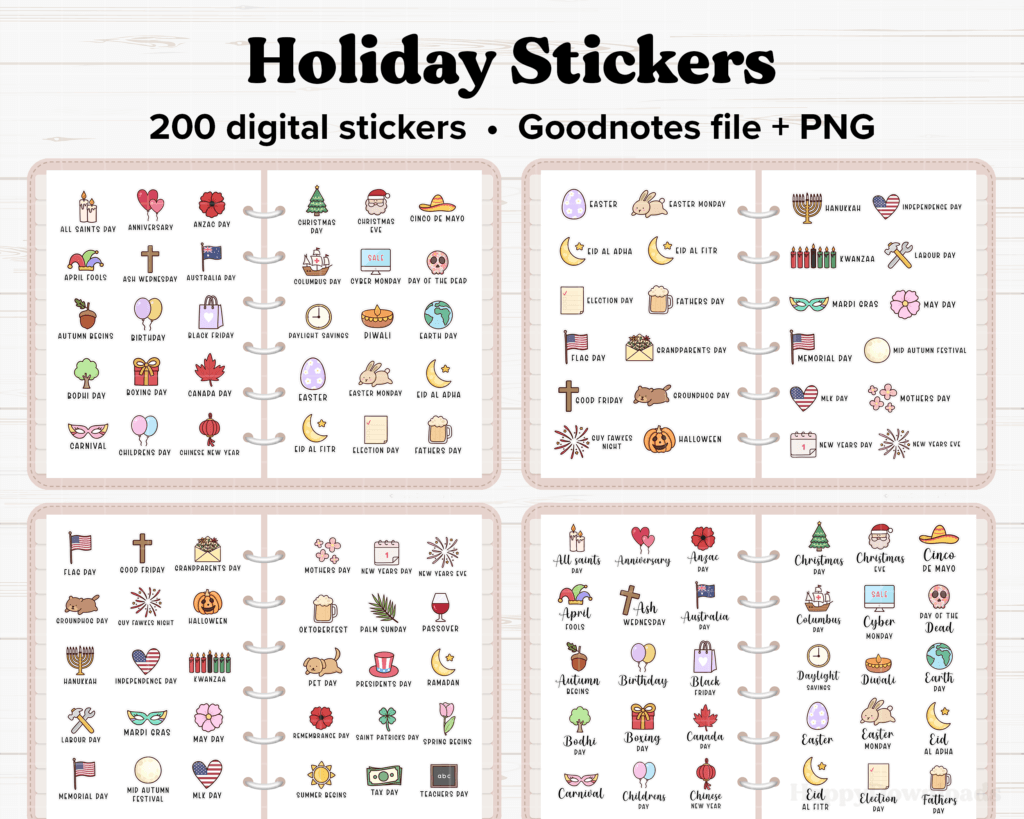
I tested them out in my planner and I’ve now added the white border around them like the everyday stickers pack. I’m so excited to be making stickers again. Now that the HappyDownloads team has grown and we have two new people working with us, they have helped me to create the actual sticker book.

In the video I also show you how I create a doodle sticky note directly in GoodNotes. You can change the color of the different parts of the doodle and add the whole thing to the elements panel as one sticker so that you can reuse it again elsewhere.

Back on my monthly spread, I added it onto my page and changed the color to white.

I’m using the iPad’s scribble function to write with text, and the reason is that the sticker itself is made from handwriting, so it will be harder to move or erase what you write if you also use handwriting on top. I love the scribble function, and if you make a mistake, you can put a squiggle through the words to erase them, which is really convenient.

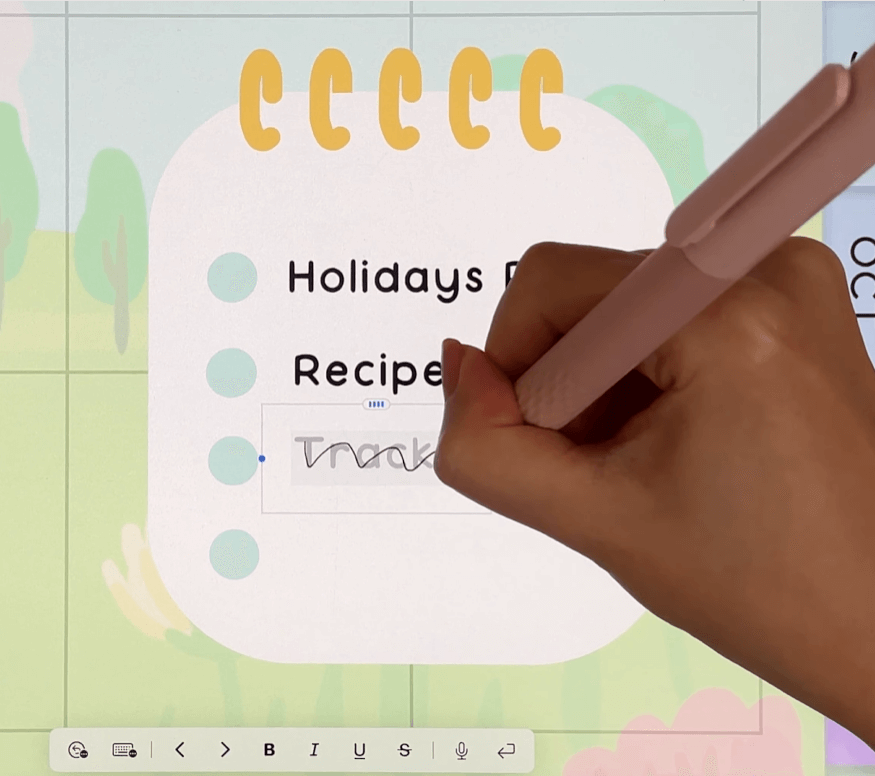
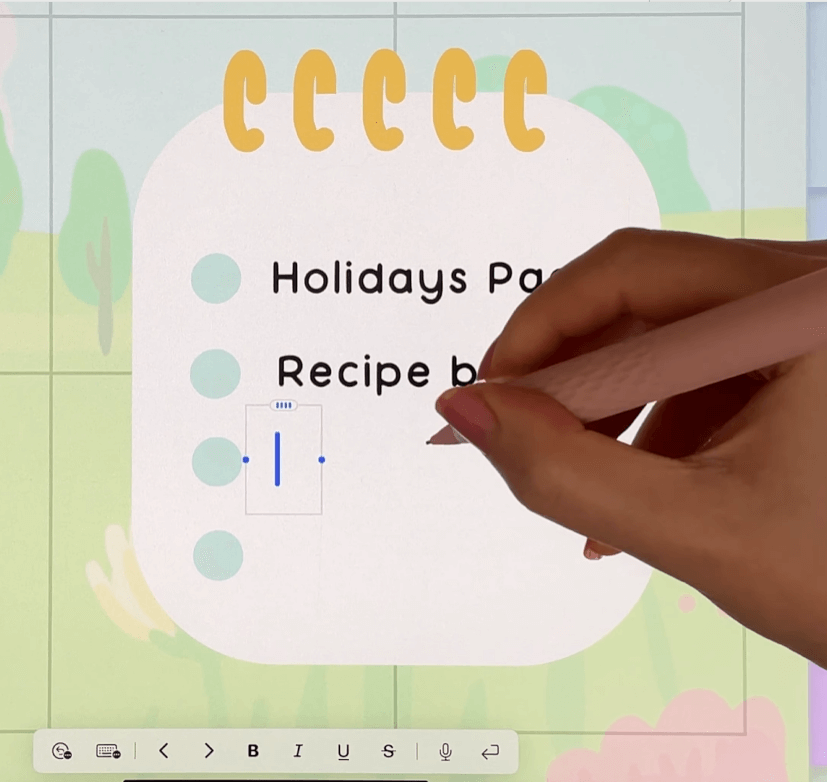
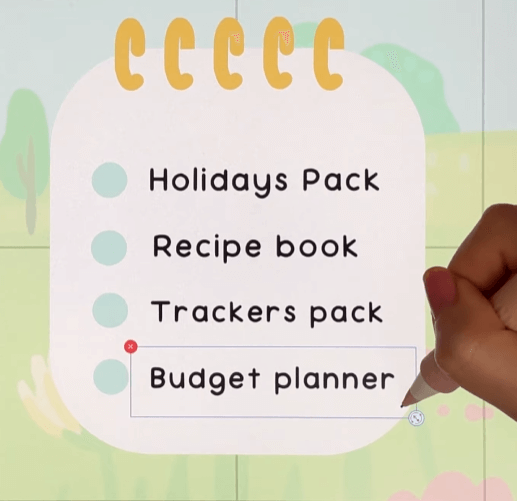
So this is just a list of products that I’m currently working on; I pretty much started everything and finished nothing. 

Another useful tool in GoodNotes is the precision eraser, and I’m using this to tidy up the rings.

When you’re using an overlay sticker that covers the whole page, and you add stickers on top, you can still select it and move it around; you just need to use the image tool instead of the lasso tool.

My month ahead is going to be super busy. I’m actually getting a bit anxious just thinking about everything I need to get done this month because we’re getting ready to leave the UK and go to Dubai. I talked about our travel plans in my last plan with me video. We’re flying out later in the month and we’re planning to stay in an Airbnb apartment while we look for longer-term accommodation.

I blocked out some time to clear out the place where we’re currently staying and I have to say I am not doing well at all on my decluttering mission. I thought it was going to be easy to box everything up and donate it to charity but I’m struggling to let go of a lot of things. We have to pack everything we want to bring into three suitcases and live with that for the foreseeable future because we won’t be back in the UK for some time.

I’m also nervous about what our new life is going to be like and if I will still be able to make videos without a fixed desk setup, as I’ll be moving from place to place. But whatever happens, I think it will be an adventure, and I’m hoping to take you guys along with me in my future plan with me videos.

Here, I’m using a split-screen window to drag and drop a sticker from my Easter sticker book and I’m creating a reminder to meet up with some friends before we leave the UK.

I also have a bunch of admin stuff to do, like canceling subscriptions and selling our car because we won’t be able to take it with us.

I absolutely love the scenery in this overlay sticker and with the green hills in the background, this looked like the perfect spot for a cute sheep sticker. Then I added a butterfly and now this is what my happy place would look like.

I love having the notes section on the side of the calendar because this is where I can write down any tasks that are not date-specific. I don’t know if it’s just me but even if I have a lot of stuff to get done, I feel better immediately once I’ve written it all out and I can see everything in one place. I also love making lists when I’m planning; it’s just so satisfying to tick off items on a list as you work through them.

A tip I have for using light-colored pens is to choose a thicker width than what you would normally use for a black pen; I just find that looks better, to my eye at least.

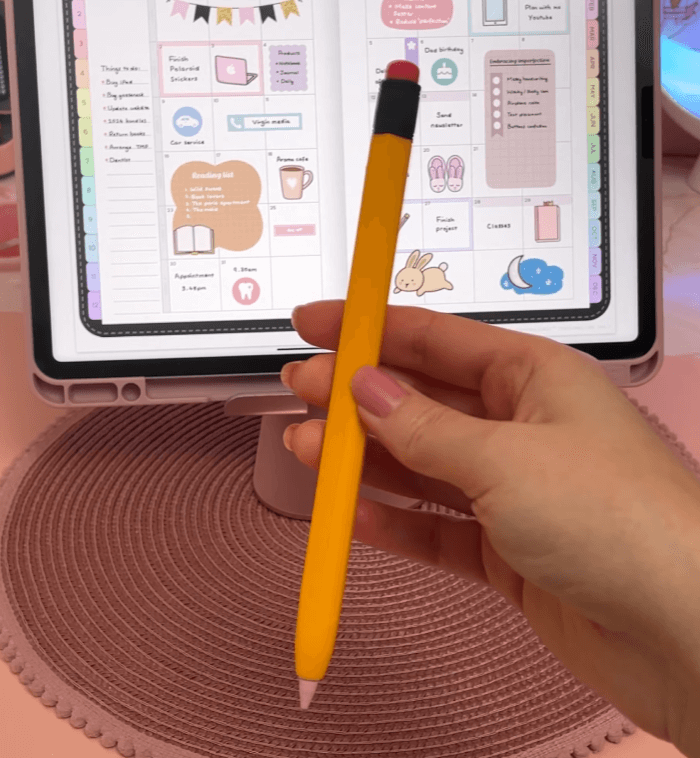
So here is what the final spread looks like:

I think this might be one of my favorite spreads I’ve ever done, and I had so much fun doing this spring theme. I typically go for pink and purple colors, so I’m really happy that I used a green planner today, and I am really loving all the blue and green shades.

I love making these seasonal spreads, but I know the seasons are different for everybody, depending on where in the world you live, so I’m sorry if this is totally out of season for you. Feel free to check out my other plan with me videos.

My best iPad accessories

Hi everyone! In today’s post, I’m going to show you my favorite iPad accessories and Apple Pencil accessories.

My iPad is the M2 iPad Pro in 12.9 inch and I have the 2nd generation Apple Pencil which I use for digital planning, drawing, and taking notes. I have a lot of accessories to show you and I will detail my thoughts on each product.

Cases

I have a few iPad cases and I’ll show you my favorite ones. I’m currently using this case shown in the picture below which I purchased on Amazon.

I like the look of it and the price was pretty affordable. The cover can also be used as a stand. The only downsides are the cover magnet is not as strong as it could be, and the inside cover tends to get dirty after a while. Here is the link for it.

On the premium end, I have this case from the brand Zugu, and I think this does a great job of protecting your iPad. It’s sturdy and also makes a great stand because you can adjust the viewing angle. It is quite pricey, however, and didn’t have as many color choices as I would have liked.

Stand

I find iPad stands to be really useful, especially when I’m typing or using it to watch something. I have the Lamicall one from Amazon that was fairly affordable and comes in this pretty pink color. If you don’t mind that you can only adjust the tilt angle, then I think this is a great buy.

I also have a couple of magnetic stands, and these are great for rotating your iPad and adjusting the view height and angle. However, the downside is you can’t use any iPad case with a magnetic stand. You have to use a special magnetic case or attach some magnetic stickers to your iPad. This one that I like is from the brand Magfit, and I haven’t noticed any issues with this.

Some people say magnetics are not entirely healthy for your iPad and I used a different brand and did notice some weird darkening of the screen in the center, which went away after I restarted the iPad. I’m not sure what happend but I don’t use that stand anymore.

Apple Pencil Sleeves

I always use my Apple Pencil with a sleeve because I find it gives me improved grip for neater handwriting. My favorite type of sleeve is the soft silicone type. Some sleeves will allow you to charge the Apple Pencil without having to remove the sleeve, but I haven’t come across any that will allow you to fit your Apple Pencil inside an iPad case with the sleeve on.

You can find some really cool designs like ones that makes your Apple Pencil look like an actual pencil. I also have one from the brand Moko that makes your Apple Pencil look like a retractable click pen. This one is super fun to use, although I find it a bit too chunky for my hands.

Apple Pencil Tips

You can find different types of Apple Pencil tips, and if you’re looking for something that’s similar to the original Apple tips, I have this pack of colorful Metapen pencil tips that I purchased on Amazon. I think these work just as well as the original Apple brand ones, and these are more affordable.

My favorite type of tips are these ones from the brand REEYEAR with a fine steel tip because I feel like they provide more precision for handwriting and drawing. They do make more noise though, which I personally don’t mind, and also I would not use them without a screen protector of some sort because there is a risk they could scratch your iPad screen. They definitely scratch up my screen protectors pretty badly!

Keyboards

I have so many keyboards it’s difficult to pick which ones are my favorite. You can use any Bluetooth keyboard with your iPad and I use different ones depending on the situation.

This first one I purchased on Amazon from OMOTON is fairly light and portable, and was priced very reasonably. It has a design similar to the Apple Magic Keyboard and I think it types pretty well.

Logitech makes decent keyboards and I like the Pop Keys mechanical keyboard for using at home because it is fairly heavy. I like the sound this makes when typing, and I think it types well.

This Knewkey typewriter keyboard is another favorite of mine just for the typewriter design alone. It’s fun to use but it definitely has its flaws like the weak backrest which I never use anymore, and also it is fairly expensive.

Apple Pencil Carry Case

This Apple Pencil carry case from Meowster is so cute and compact I had to get it, even though I don’t find myself using it that much because my Apple Pencil is usually already protected in a sleeve. I think this would be great for traveling because it also has slots for extra pencil tips. I got the version that fits the Apple Pencil without any sleeve on, but I do remember seeing different ones that could fit a sleeve as well.

Screen Protector

I highly recommend getting a screen protector for your iPad, and if you use it for any kind of note-taking, digital planning, or drawing, then I would suggest getting a matte screen protector because I find that makes the screen less slippery when you’re using the Apple Pencil. I have tried a bunch of different brands and honestly haven’t come across the perfect one.

Paperlike is very popular – I like it because it doesn’t feel like sandpaper, however, it is a bit more expensive, and I personally wasn’t blown away by the results – also, it got scratched up pretty quickly by my Apple Pencil tips. I’ve heard lots of good things about this brand, and the reviews on Amazon seem really positive, so this is what I want to try next.

Out of the brands I’ve tried, I also liked the screen protector from doodroo– it writes well, however, it does feel very rough in texture, so just be aware that this type of surface will wear down your Apple Pencil tips faster. I do still think it’s worth it for the improved handwriting, and you can get more affordable replacement tips than the official Apple ones.

Carry Cases

I have this soft carry pouch from Moko that fits my 12.9 inch iPad Pro. This is great for protecting your iPad from scratches, especially if you’re not using an iPad case. It also has an extra pocket that can fit a small keyboard.

For traveling, I have this hard case from Tomtoc that is really roomy. It can accommodate my iPad Pro, as well as other accessories like Apple Pencils, charging cables, and small keyboards.

Apple Pencil Alternatives

I love the Apple Pencil, and I’ve shied away from non-Apple stylus pens until I tried one out recently. I purchased this one from JamJake on Amazon, which had very positive reviews, and I have to say I am really impressed considering I only paid around $30 for this.

I used this to write in my digital planner, and I thought this performed very similar to the Apple Pencil. It doesn’t have pressure sensitivity, which isn’t a huge problem for me because I don’t use that feature anyways for note-taking or drawing, but just be aware of that limitation if you do need it.

The other downside is that you can’t switch the tips out with the standard tips that fit the Apple Pencil, so once you get through all the spare tips, I guess you will need to buy a new stylus unless you can find a pack of replacement tips.

Mouse

I have some Bluetooth mice that work with the iPad, although I don’t personally use them that much. This pink one from OMOTON from Amazon was pretty cheap, and it does the job, but it doesn’t work well with all types of surfaces.

There’s a wide variety of iPad and Apple Pencil accessories available that can improve digital planning on your iPad. From cases and stands to keyboards and screen protectors, these accessories can make your iPad more versatile and convenient to use. By trying out different options and finding the ones that best suit your needs, you can create the perfect setup for your digital planning, drawing and note-taking.

Best iPad apps in 2023:
 Notetaking, productivity, and more

My favorite iPad apps on my iPad Pro ❤️

Hi everyone! In today’s post I’m going to be showing you what’s on my iPad and share some of my favorite iPad apps for notetaking, productivity, creativity, self-care and more. So stay tuned if you’re interested in finding out the best apps in 2023. Most of these are also free to download.

1. Best iPad Digital Planning & Notetaking Apps

I love using my digital planner to stay organized and track things like my schedule, to do list, goals and habits. An iPad is an ideal device for digital planning and notetaking as using a stylus pen makes it super easy. As a former paper planner addict, I’ve been enjoying these notetaking apps to use my digital planner.

GoodNotes (Free to try, $8.99 to unlock premium features)

GoodNotes is my favorite note-taking app to use for digital planning on Apple devices. I import digital planner PDF files into the app and write on with my apple pencil. Using the planner helps me stay organized and track things like my schedule, to do list, goals and habits.

Collanote (Free)

Collanote is a free note taking app with lots of useful features and this is what I recommend for digital planning if you are looking for a GoodNotes alternative. There is also a free version of our happydownlaods digital planner for those who want to try digital planning for free.

2. Best iPad Widget Apps

Here is the list of widget tools I’ve discovered to make and customize widgets in different styles.

Photo Widget (Free, In-App Purchases)

I use Photo Widget to create image widgets and there’s a huge selection of cute and aesthetic widgets for things like time and date, calendar, battery, quotes and more.

Widgetsmith (Free, In-App Purchases)

Widgetsmith has similar widgets to Photo Widget, but more minimal style.

Pinterest (Free)

Pinterest Widget lets you browse images and save them to different collections and display them.

Bears (Free, In-App Purchases)

Bears is a cute app that lets you create countdown widgets for things like birthdays, upcoming events and deadlines.

Zen Flip Clock (Free, In-App Purchases)

Zen Flip Clocks is a widget with a minimalist design that helps you get into distraction-free zen mode.

MD Clock (Free to try, $9.99/year for full version)

MD Clock offers cute, animated pixel widgets that make your heart go aww.

3. Best iPad Drawing Apps

There are a number of iPad drawing apps that can supercharge your creative power. They are all easy to use and you’ll have fun playing with them!

Procreate ($12.99 one off payment)

So far, Procreate has been my favorite drawing app.  It’s super intuitive and easy to use, and you can also create your own brushes. I also use it to decorate my digital planner to add colors.

Sketchbook (Free, In-App Purchases)

Sketchbook has all the basic drawing tools and it’s free!

Art Set 4 (Free, In-App Purchases)

I had so much fun playing with Art set 4. It has realistic tools like oil paint and the colors blend in with so much realism and I can’t wait to create a painting with this.   

Pixelable (Free, In-App Purchases)

For pixel art lovers, Pixelable lets you create your own pixel art and you can choose your own grid size and create layers.    

4. Best Useful Tools for iPad

Digital planning is more fun with custom fonts and colors. For those who want to take further with digital planning, here are the tools you might find useful.  

iFont (Free, In-App Purchases)

I use iFont app for installing custom fonts to use in my digital planner, and you can find a ton of free fonts.

Coolers (Free, In-App Purchases)

If you’re looking for aesthetic color palettes, Coolers lets you browse and save different palettes and you can copy and paste the hex codes into note taking apps like GoodNotes.

Calculator (Free, In-App Purchases)

I also have the Calculator app which you can have open in a split screen, and I like that you can customize it with different color schemes.

5. Best iPad Productivity Apps

It’s easy to get distracted by iPads and other devices. These apps can help you to focus on getting your work done. From the Pomodoro technique to habit building, these are my favorite iPad productivity apps.

Forest ($3.99, In-App Purchases)

Have you heard about the pomodoro technique? It’s the productivity technique that I’ve been using to stay focused, in which you work on a task for 25 minutes and then take a break. Forest app lets you grow trees for your forest when you succeed working for 25 minutes. If you stop the timer before it’s complete, you’ll kill the tree. 🙁

Smile todo (Free, In-App Purchases)

Smile todo is a cute app for tracking your daily habits. You can choose their frequency and when you complete a habit you just tap on it to color it in, and there’s also a widget for your homescreen.

Habit (Free, In-App Purchases)

For those looking for more detailed habit tracker, Habit lets you track exactly how much progress you’ve made on a particular habit like the number of steps you’ve walked in a day.

Structured (Free, In-App Purchases)

I love making to do lists and you can structure them into a daily timeline using Structured, and you can also get notifications and widgets for your homescreen.

Routinery (Free, In-App Purchases)

Routinery lets you create routines like a morning routine and then add habits into this routine. You set how long each habit takes and you start the timer to begin doing it.

6. Best iPad Coloring Apps

Do you like coloring books? Then you don’t want to miss out this section. 

Lake (Free, In-App Purchases)

Lake is a coloring app with a big collection of coloring books. I also love that you don’t have to worry about going over the lines, and you can either color in using brush strokes, or using the paint bucket option which lets you fill an area with a single tap.

Color by number (Free, In-App Purchases)

Or how about making coloring as a game? Color by number is a coloring game app that is super easy and fun to play.

7. Best iPad Self-Care Apps

We all have busy lives, but don’t forget to take care of yourself. Recently, I’ve been focusing more on self-care and these apps have been helpful.

Finch (Free, In-App Purchases)

Finch lets you take care of a virtual pet, and when you complete self care exercises it helps to grow your pet and you earn rewards. You can set daily goals and there’s lots of mindful exercises you can do.

Insight Timer (Free, In-App Purchases)

Insight timer is a guided meditation app with soundtracks for relaxation and sleep. Also you can add inspirational quote widgets to your homescreen to get daily dose of motivation.

I am (Free, In-App Purchases)

If you like quotes on your homescreen, I am is a super simple app that gives you daily positive affirmations.

Stoic (Free, In-App Purchases)

Stoic app has daily quotes and prompts for you to reflect on and journal about for improving mental health and changing negative thoughts.

Dailybean (Free, In-App Purchases)

Dailybean lets you keep a daily journal where you tap on different chioces to record things like your mood emotions and activities. Also, you can add in a daily photo.

8. Best iPad Reading Apps

I’ve been trying to read more and keep track of books that I have read. If you are also interested in that, I’d suggest you to check out these apps.

Reading List (Free, In-App Purchases)

Reading list lets you quickly find and add books by searching the title or scanning the barcode. You can rate books and write a note, and create different books lists.

GoodReads (Free)

GoodReads is great for finding new book recommendations and reading book reviews.

9. Best iPad Learning Apps

Here is a list of learning apps for those who want to pick up new language or expand their knowledge.

Duolingo (Free, In-App Purchases)

Duolingo is a simple, fun language learning app with over 40+ languages. I’ve been using Duolingo for improving my mandarin, and the lessons and quizzes are very good and fun to use.

Quizlet (Free, In-App Purchases)

Quizlet lets you create your own study flashcards or you can find ones created by other people.

10. Best iPad Photo and Video Editing Apps

Taking photos and videos are one thing, but editing can be time consuming. But help from these apps, photo/video editing can get more simple. 

Inshot (Free, In-App Purchases)

InShot is a powerful video and photo editor that is easy to use. You can add transitions, effect, stickers and text using the app to your video and photo.

Capcut (Free, In-App Purchases)

Capcut is another video editing app that offers intuitive and simple functions like InShot.

Lightroom (Free, In-App Purchases)

Lightroom from Adobe has great tools for editing your photos and videos like brightness, saturation and hue.

Prisma (Free, In-App Purchases)

Prisma turns your photos into art style paintings, and there’s lots of different art effects to choose from.

11. Useful Default Apple Apps

iPad comes with a number of default Apple apps. Here are the ones that I have been using often to get organized with my digital planner. 

Shortcuts (Free)

If you want to automate your tasks and schedule, Shortcuts is worth a shot. Shortcuts is super useful for setting up custom shortcuts to apps and files, and I also use this for linking between my digital planner and apple calendar.

Calendar (Free)

Organizing your life starts with using the calendar. I often add links to my calendar from my digital planner so I can get all my schedules synced across devices.

Reminders (Free)

I use the Reminders app for displaying reminders on my homescreen, and I like that you can drag and drop handwritten notes from apps like Goodnotes.

Best Digital Planners for 2023

With new year coming up, many people are aiming to become more organized and focus on their goals and are looking into digital planning. Whether you have an iPad, Android or Windows tablet or PC, there are various options that will help you focus on the goals important to you and increase productivity.

Since creating my first digital planner a few years ago, I’ve helped over 100,000 customers take their first steps into digital planning and I’m excited to help many more in future.

Best Free Digital Planner​

If you’re new to digital planning, try my free digital planner that will show you how they work and the type of functionality available in digital planners. Check out my video below where I show how to get started with digital planning and my free planner:

I also have free digital planning stickers available for you to add to your planner for note-taking or decorations.

Best Digital Planners for iPad​

Our most popular digital planner bundles work on iPads and Android tablets. There are many different choices of digital planning apps including Goodnotes, Notability and Noteshelf.

Our planner bundles work on all of the above apps and comes with video tutorials, over 50,000 stickers, 50+ templates and a money back guarantee. Some of my digital planner bundles now have over 1 million different variations to choose from. Choose from the different styles and colors available in our digital stationery shop and I show our rainbow planner below:

Best Digital Planners for Android​

Android digital planning apps are currently behind the Apple apps but more are coming out and improving over time. Check out the recent video Dan made below on digital planning on an Android tablet. I recommend Penly app, which comes with a couple of minimalistic happydownloads planners within the app and you can see Penly plan with me videos on my youtube channel.

Best Digital Planners for Windows PCs, Surface Pro, Mac and Other Devices​

For other devices, the digital planning apps are limited but fortunately OneNote works cross-platform on all devices with the OneNote app. You’ll first need to set it up on a iPad, Surface Pro or Windows PC and, once imported, you’ll be able to open the notebook on any device with OneNote installed. 

Best Digital Planners for Students and Teachers​

Digital planners are great for students and teachers. The ability of taking all your lesson or course notes in one place can really help you to organize your documents and bookmark pages you want to revisit . You can also add files to your planner so you can keep them in one place.

In my student and teacher planners, we have specific templates that help you easily take notes to track assessments, class/student info and many more layouts.

Student digital planner shop listingTeacher digital planner shop listing

Speciality planners

We have many other expansion packs for other areas including Faith, Finances, Health & Fitness, Homeschool, Mom, Me Time, Business, Work, Travel and many more available.

These provide additional specific templates that you’re able to copy and paste throughout your planner.

How to write neatly on an iPad – My top 10 tips!

Hi everyone!

Here's my top 10 tips on how to write neatly on an iPad:
  1. Use a matte or paper feel screen protector
  2. Get an Apple pencil cover to give you better control
  3. Insert lined or grid paper (FREE insert) to help guide your writing
  4. Try writing on black colored paper
  5. Try different zoom levels to find what suits your writing
  6. Slow down speedy! Try writing slower.
  7. Take a screenshot and practice tracing over specific fonts
  8. Change pen settings so you can try writing with different pen styles and widths
  9. Use some handwriting practice worksheets
  10. Cheat! Use the scribble handwriting to text feature
I show in the video above my best tips for how to write neatly on the iPad. I'll also be sharing some freebies that will work on an iPad as well as Android tablets. My handwriting isn't all that neat but I find that these tips definitely do help me:

Tip 1 - Use a matte or paper feel screen protector


Using a paper feel screen protector will give the screen a less smooth surface and will help you to control your writing better and it is also great for drawing. The downside is the screen can look a little bit less clear and will be rougher to the touch but I think that benefits outweigh the downsides.

I've actually just purchased a bunch of screen protectors so I'll be doing a separate video to review them but a popular option is Paperlike.

Tip 2 - Get a grip! Use a Apple pencil cover to give you better control


I also recommend getting a grip for your Apple pencil. This is just a rubber cover that goes over your apple pencil that can help you to get a better grip when you're writing.

Tip 3 - Use lined or grid paper/inserts to help guide your writing


Where you can, write on lined or grid paper. However if you need to write on a page that doesn't have lines i have some freebies in my freebies vault that will help with that so I've made these overlays in a variety of different formats.

This one is lined so you can just put it onto your page as an overlay and then you can also resize it to be narrower or wider and then you can just zoom in and write on it.

Once you're done writing you can just tap on that overlay and delete it. I've also made a grid overlay a dotted version and the same overlays for black paper as well. I’ve previously made these paper widgets which basically works like a sticky note:


You can just place these on your page, resize them to fit and then you can just write over the top of them.

Tip 4 - Try writing on black colored paper


You can also try writing on black paper as I personally think this makes your handwriting look neater as helps the writing stand out.

Tip 5 - Try different zoom levels to find what suits your writing


If you're having trouble with your handwriting, I suggest zooming in and in goodnotes it's very easy to do this. You can just bring up this second screen and you can zoom in or out and then just write onto this second zoomed in screen.

Tip 6 - Slow down speedy! Try writing slower.

Try writing slightly slowly as often this will help you gain more control over the stylus you're using, which will help you write more smoothly.

Tip 7 - Take a screenshot and practice tracing over specific fonts


If you find someone's handwriting or a font that you really like the look of, there's an easy way to practice writing that style. You can just swipe your pencil from the left screen on your iPad to take a screenshot (or do this manually for other devices) and then tap on full page and then you can share this into good notes as a pdf. Then you can just trace the handwriting with a different pen for practice.

Tip 8 - Change pen settings so you can try writing with different pen styles and widths


My next tip is to play with the pen settings and find one that works for you. I personally prefer to write with a ball pen. This is a mono line which means that the stroke size is all the same width, whereas if you pick something like the fountain pen or the brush pen these can be pressure sensitive so i personally find these harder to write neatly with.

Also play with different pen thicknesses. I personally prefer somewhere around the 0.5 millimeter mark. If you're using an app like GoodNotes, you can go into settings and play with the stylus and palm rejection settings.


Under writing posture section, you can pick the one that most closely mimics your actual writing posture. Also under palm rejection sensitivity, there is high, medium and low so you can try these different options too. Different apps have different writing engines, which are worth trying to see if you have preference for a particular app.

Tip 9 - Use some handwriting practice worksheets


My next tip is to practice. The more you practice at anything, the better you will get at it and the same applies for handwriting. You can buy handwriting worksheets and instead of printing them out you can just use an annotation app like Goodnotes. It's really easy to practice your handwriting in these by tracing over the letters and if you find yourself messing up on a particular letter then practicing those letters will definitely help you to get better at them.

I suggest finding a handwriting worksheet where the handwriting looks nice to you and you can use this to practice i've also made these practice handwriting overlays that you can place into any blank page and use this to practice your handwriting writing neatly on the ipad takes practice

Tip 10 - Cheat! Use the scribble handwriting to text feature


If after going through the above tips you still want that perfect neat handwritten look here's a quick way to cheat (shhh!) for the iPad. In settings, under Apple pencil, make sure you have scribble turned on and then inside an app like GoodNotes you can just put down a text box and then write with your Apple pencil. You'll just want to make sure that you have some neat handwriting fonts installed in your ipad.


I hope you like these tips!

Rina

Cute iPad Keyboards for Digital Planning

Hi everyone!

I recently bought some cute iPad keyboards for digital planning. They are Bluetooth so also work on other devices so today I’m just going to go through each of them and share with you my thoughts.

This first one is the Logitech K380:

Logitech K380 keyboard

I purchased this from AliExpress and I’m going to share with you the link to that below but you can get a very similar one to this from Amazon and I will share the link to that as well. I think the one on AliExpress has the pink and the white keys whereas on Amazon it's just the pink version. I was debating between the two but I went with this one in the end just because of the cute bunny and the cartoon on the edge.

I found this keyboard really easy to type on. The spacing of the letters was just perfect. I could type really fast and I felt it was very comfortable for me to type. It was easy to switch on and the reviews also mentioned that the battery life is very good, although I have yet to use it that much so I cannot comment on that.

Based on the design being really cute and the ease of use I definitely would recommend this one, so here is the AliExpress listing of the Logitech keyboard that I purchased:
AliExpress link
Amazon link - different design (please note this is an affiliate link. I get a small commission with each purchase)

I did not find this design on amazon as they only had this pink one which is why I decided to purchase it on AliExpress.

The next one I’m going to unbox came from AliExpress as well but you can also get this on Amazon:

Ajazz keyboard

The main reason I use AliExpress over Amazon is just because of the price difference. Sometimes I recommend checking it out and then you can see which price is better for you.

This one I purchased purely because of the appearance of it. It looks really cute and the design is really nice. I like the edging around it as well and I do like the typewriter look. I’ve got my eye on some other typewriter keyboards actually but those are a lot more pricey so I think that for the price this one is a really good typewriter style keyboard and I did find this keyboard easy to type with as well. However, possibly due to the height of the keycaps and the spacing, I found myself making slightly more errors than with the other keyboards so I would say that this definitely wins on the looks front but due to functionality I would probably dock off one point for that, but it is really satisfying to type on it. It does feel a bit more springy so a bit more like a typewriter. If you want to type really fast, I probably would go with one of the other ones.

Here is the AliExpress listing:
AliExpress link

They also had other colours as well which look really nice and I chose AliExpress just because of the price but you can also get this one on amazon as well and they also do have different colours including this purple.

This is the other keyboard that I purchased also from AliExpress:

AliExpress keyboard

So the best thing about this keyboard in my opinion is that it's rechargeable so you can just plug your charger into there and then you don't have to use batteries with the other one and on the looks front I do prefer the other ones though because you can see the white letters. I feel like they don't stand out that well on the pink keys but overall, it does still look cute so I’m glad I purchased this.

I found the typing on this one very comfortable as well and considering this was much cheaper than the Logitech. I think this is pretty good value and it's also rechargeable. If you don't have to look down at the keys all the time and you kind of know where your keys are, I think that the pale letters on the pink keycaps will not bother you, so I do think that this was a good buy. I’m glad I have it in my collection and this is the AliExpress listing of that rechargeable keyboard:

AliExpress link

They also have a battery version one so if you go down in the description you can go to the battery version one which I think is slightly cheaper, but I prefer to get rechargeable where possible.

This is the last keyboard I got this one on Amazon:

Omoton keyboard

I purchased this a while ago, so I don't have an unboxing but this one was the cheapest out of all of them and I think the price for this is just amazing because it works really well, and I also got it in a set that comes with this mouse.

I do think that this types pretty well so I’ve had this keyboard for a while now and I haven't run out of batteries yet. It is very easy to connect and to use and I find the keys very comfortable to type with and the price of this is also amazing. I trolled through a lot of Amazon listings and I couldn't find many other keyboards that were as highly reviewed and as cheap as this one so I think that this is definitely a good buy if you're looking for a reasonably priced option that works well. This is the amazon listing I purchased the pink one but you can also get different colours as well:

Amazon link (please note this is an affiliate link. I get a small commission with each purchase)

You can see it's got tons of reviews and the feedback was pretty good, so I definitely think that this was a good purchase. You can also get a version that comes with the mouse as well.

I am really happy with all of my purchases because when it comes to typing I did not find any of them lacking when compared to the apple keyboard. I also like the design as well and especially considering that some of them are really affordable I am definitely happy to have them in my collection.

So here is an overview of all the keyboards:

All keyboards

You can see the Logitech is actually really small which is amazing because it types really well and the Ajazz keyboard is actually the biggest and I would say it types the least well but looks the prettiest in my opinion. You can see these other two are fairly similar in size and design.

Hope you find the keyboard reviews helpful!

Rina

How to decorate a digital planner

In this article, I’m going to show you 4 easy ways you can decorate a digital planner on an iPad or Android device. Watch the video above where I talk through each of these tips in more detail.

Tip 1 – Add color using a drawing app such as Procreate or Infinite Painter

Turn your white planner layouts to color using drawing apps like Procreate (iOS) or Infinite Painter (Android).

  1. Take a screenshot of your planner page
  2. Paste the screenshot in Procreate (or Infinite Painter)
  3. Make another layer
  4. Draw boxes around where you want color and fill them in
  5. Turn down the transparency of the whole layer so that you can still see the planner writing underneath
  6. Save as a PNG and use in your planner!

Tip 2 – Use color blocking or other free digital planner stickers

You can also use individual color block stickers to decorate your planner. Simply drag the edges of the color block until they fit whatever area you’d like to “color in”. You can grab lots of freebie color stickers from our freebies vault.

Tip 3 – Use an overlay sticker

An overlay sticker is a sticker that goes over the entire page, and is great for when you can’t be bothered to decorate with individual stickers. You can grab some from our freebies vault but it’s also easy to make your own in Procreate (iOS) or Infinite Painter (Android).

  1. Take a screenshot of your planner page
  2. Paste the screenshot in Procreate or Infinite Painter
  3. Make another layer
  4. Draw your shape/doodle and color it in
  5. Make a new layer and draw a new doodle (so that each layer has one item)
  6. Rearrange the doodles to your liking
  7. Merge all the doodle layers and save as a PNG to use in your planner

Tip 4 – Make your own stickers from web images using Magic Eraser (iOS) or Background Eraser (Android)

You can use any clipart from the web and make these into planner stickers (make sure you’re using for personal use only, as web images will be subject to copyright). Simply save the image, bring it into Magic Eraser app, and tap the white background to remove it. You can toggle the tolerance threshold to remove more or less of the white background. Finally just save it as a PNG and you can use it in your planner.

Importing a digital planner into Goodnotes

Setting up digital planners can take a little time but I provide a detailed step-by-step guide on importing our HappyDownloads GoodNotes digital planner to make it as simple as possible. These instructions are focused on the planners available here at HappyDownloads but see the Step 5 which will work for similar PDF and Goodnote files.

There are shortcuts you can make to shorten the process but I’ll focus on providing the most reliable way of getting it to work on your iPad. We recommend digital planning on a tablet with a stylus rather than on a phone.

Step 1: Install Goodnotes or update your current version ​

The first step is to make sure you have Goodnotes installed and up-to-date ready to be put into action! Go to the Apple app store and tap buy/install or update your version to the latest available. 


Goodnotes - how to update to latest version

You can see your version of Goodnotes any time by going to the “About” section on the dashboard:

Goodnotes 5 - how to see your version for digital planning

Step 2: Import the PDF digital planner file to GoodNotes

There are a two ways we can import our downloaded files into Goodnotes:

-sharing it to Goodnotes
– opening it from the Goodnotes app

I demonstrate in the video below how to share files into Goodnotes but the second way should work as well.

The digital planner files are now imported into Goodnotes and should be ready to use!

If you’ve had any issues with out planner, please check out our Goodnotes help page. If that doesn’t solve your issue, please send us a message through this website with your order number and we will help you get it working. Please check that you are using the latest version of Goodnotes and let us know where you are not able to carry out the above steps. I hope you found our guide showing how to import a Goodnotes digital planner useful!

Paper vs Digital Planner – pros and cons

I discovered digital planning in 2017 and haven’t looked back, although I still kept some information in my beloved Filofax. Having used both digital planners and regular planners, here’s a summary of the pros and cons to help choose between a digital or paper planner

If you’re not sure if digital planning is for you, the best thing to do is to download a freebie digital planner or purchase from a seller that offers refunds to try it out. We offer a 30-day money back guarantee on all our products in our digital planner shop so you can try out digital planning completely risk free.

Advantages of Digital Planners

1 – Easy to get creative with your planner using digital planner stickers

  • With a digital planner you can add stickers and images to your planner easily.
  • You can duplicate all the stickers and use them again and again, unlike paper stickers where you need to top up your supply if you run out.
  • There’s lots of digital stickers available for purchase but you can also make your own stickers using free clipart on the internet so you don’t even have to spend anything.


Want FREE digital planner stickers?

Sign up to our mailing list for access to my Freebies Vault


Thank you for subscribing! Go to my free digital planner stickers page and enter the password LoveHappyD


2 – You don’t need to worry if you make a mistake

 Ok, I admit it, I’m a perfectionist. I had to use an erasable pen with my Filofax because I just hate messy handwriting or when I make a mistake. With digital planners, it’s super easy to fix any mistakes because you have an erase and undo function. No more covering up mistakes in my Filofax with washi tape!

There’s lots of different colors and layouts available so you can find something that works for you (and maybe even achieve planner peace!). With most of our digital planners in the shop, we offer a bundle that includes both a vertical and a horizontal weekly layout so you have the options to use either.

There’s also lots of options of templates and you can even create your own, so you can have a planner that works perfectly for your planning needs. When I was using a Filofax, I also made my own inserts but printing them out and cutting the pages to the correct size was a huge pain!

3 – Adding photos easily

You can add photos directly from your device without needing to print it out and sticking it in. With a paper planner I always had intentions of adding photos but never got round to it, simply because it was too much hassle!

4 – Having all your planners with you everywhere

Some people like to use different planners for different purposes. I was using several different paper planners and found it hard to carry them with me everywhere. So I usually left my Filofax Malden at home and carried around a smaller planner. With digital planners, you can have as many planners as you want and be able to access them anywhere.

5 – No fear of damaging the rings or the leather

I don’t know about you but I babied my Filofaxes so much. I always took care not to overstuff them for fear of damaging the rings. And I NEVER put my Malden directly into my bag in case the leather got scratched by my keys. With a digital planner you can totally relax. Add as many pages and stickers as you like!

I’m sure there’s other pros but before I get carried away let me move onto the cons.


Disadvantages of Digital Planners


1 – Learning curve

If you’ve never used a digital planner before, it will likely feel unfamiliar to you to begin with as you get to grips with how to use it. It gets a lot easier with practice so I recommend you stick with it for a few weeks at least. We offer a 30-day money back guarantee on all our products in the shop so you can try out digital planning completely risk free.

Also check out our YouTube channel for beginners videos.

2 – I like the feel of leather planners

I absolutely love the leather on my Filofax Malden and a digital planner doesn’t have that. But like I mentioned above, this is both a pro and a con.

3 – Writing on a screen vs writing on paper

Personally I don’t mind this one but I know lots of people prefer writing on paper. There are some screen protectors that promise to make your screen feel like writing on paper but I haven’t tried these out myself.

4 – Flipping through pages and adding in tabs

You can use the bookmark function in some apps to bookmark pages but it’s still not as easy as simply putting in a tab on a paper planner and flipping to it.

It’s also easier to flip through the pages generally in a regular planner however if you choose a digital planner with lots of hyperlinks (like our planner), it is still easy to navigate around.

So there you go, a summary of the pros and cons of digital planners compared to regular paper planners to help you choose between a digital and paper planner. What do you think, are there any points you think I’ve missed? Let me know in the comments section.

Importing OneNote Digital Planners: a step-by-step guide

Setting up OneNote digital planners can take a little time to import but I provide a detailed step-by-step guide to make it as simple as possible. These instructions are focused on the OneNote templates available here at HappyDownloads but work on other documents too and cover importing on iPads, OneNote for Windows 10, OneNote 2016 and for Macs.

The general steps are shown below but I recommend watching the videos:

(i) tap on the OneDrive link to your OneNote planner
(ii) make sure you are logged in to a personal Microsoft account in top right
(iii) tap the version of the planner you wish to use
(iv) it should open in OneNote Online
(v) tap the "Open in App" button in top right
(vi) a read-only version of the planner should come up
(vii) create a new notebook
(viii) long press on a section (choose all if you can) and then copy to the new notebook
(ix) You should then be able to use the digital planner.

Importing OneNote Planner on iPads:


Watch the video below to see how to import OneNote Planners on an iPads:


OneNote for Windows 10 import video:

Watch the video below to see how to import on OneNote for Windows 10:


Importing OneNote Planner on OneNote 2016:

Watch the video below to see how to import on OneNote 2016:


Importing OneNote Planner on Mac:

Watch the video below to see how to import on Mac (same as OneNote for Windows 10)
NOTE: YOU MUST USE GOOGLE CHROME (NOT SAFARI)


Other devices:

You need to use a Windows or Mac PC, iPad or Surface Pro to first set up the planner on other devices. This is because some devices and OneNote versions have less functionality.

If you have purchased a HappyDownloads OneNote planner and do not have access to another device, please contact me at the bottom of the screen with your order number.

OneNote Digital Planning Guide

Digital Planning in OneNote​

You have your planner in OneNote and now ready to use (if not, check out our importing OneNote planner guide) but how do you use the planner and what functionality is there in OneNote? Our OneNote Digital Planning videos below will answer your questions!

Watch the videos below which uses our HappyDownloads planners to show how to use digital planners in OneNote, including how to use stickers, covers and the template pages.

Using our OneNote Planners​

You have your planner in OneNote and now ready to use (if not, check out our importing OneNote planner guide) but how do you use the planner and what functionality is there in OneNote? Our OneNote Digital Planning videos below will answer your questions!

Watch the videos below which uses our HappyDownloads planners to show how to use digital planners in OneNote, including how to use stickers, covers and the template pages.

The video above shows how to do the following on an iPad Pro:

1. Zoom in and out of the digital planner using the page width tool or by pinching the screen.
2. Use the navigation panel to jump to the different sections and pages within the planner.
3. Populate the undated version of the planner.
4. Undo or redo changes in the planner, as well as how to use the eraser tool.
5. Use the stickers that come with the planner. To use the stickers, you need to go the stickers section, tap on text mode, select the sticker, long press and copy it, go back to where you want to paste it, long press and tap paste. You can then rotate, drag, and resize as needed.
6. Using templates and talking through the index page of all the different template pages. You can tap on them to jump to the relevant template and then copy these pages and paste to a new section. You can do this by long pressing on the page in the navigation panel and selection Copy/Move. You can then rename the title of the duplicate page as needed.
7. Using the divider pages to create your own tailored sections of templates.

How to use Microsoft OneNote for Digital Planning​

The video above shows how to do the following on a Surface Pro:

  1. Access different notebooks, sections and pages using the navigation panel.
  2. Repositioning sections and pages in the navigation panel.
  3. Copying OneNote sections and pages.
  4. Password protecting pages with sensitive information.
  5. Carry out a word search throughout the planner and handwriting.
  6. Use the recent notes section to access the most recently used pages.
  7. Zoom in/out and how to use the page width tool and full screen mode.
  8. Access deleted notes that you’re able to restore.
  9. Change the pen size, color and style (e.g. pen, pencil, highlighter).
  10. Using the eraser tool and changing the different settings (whole stroke, partial stroke).
  11. Using the lasso icon to select and move items around.
  12. Using the text icon, changing font styles and setting the default font type and size for your OneNote app.
  13. Adding images/pictures/photos to the planner.
  14. Copying and pasting stickers
  15. Ensuring that syncing is setup in OneNote so you’re able to access on other devices.

Hopefully the videos have helped explain how to use our OneNote planners in Microsoft OneNote. If you have any questions, just contact us here.

Goodnotes Troubleshooting

Oh no! Things haven’t gone quite to plan and you have some issues with Goodnotes or your digital planner and need some Goodnotes help? Don’t worry, we have a few tips and tricks to help you out in our GoodNotes Troubleshooting Guide below.

Hyperlinks are not working

The most common issue is regarding hyperlinks. If your hyperlinks are not working please do the following:

  • make sure your version of Goodnotes is fully up-to-date (tap here for details)
  • make sure you are on read-mode (tap here for details)
  • use Safari to initially import the planner (if using Chrome use the “Open With” function instead of the share icon)
  • reimport the planner
If the above hasn’t worked, long press on the hyperlink that isn’t currently working.  You should see an option that says “open link”. Tap this and it should jump to the relevant page. If it works using this method but not in read-mode, then there is a bug in Goodnotes 5.  For our customers, please let us know and we will raise this with Goodnotes.
 
If the “open link” option doesn’t come up, we recommend you try to reimport the planner. If after all this it still doesn’t come up, it is likely to be a Goodnotes bug. For our customers, please let us know and we will raise this with Goodnotes.
 

Help! I deleted a page/planner by accident.

It can easily happen to all of us! We’re perfecting our planner and “whoops!” deleted the wrong page? Is that the end or is there a way to get it back?

The regular undo function doesn’t work but don’t panic, there is still a way!

If you go to the dashboard, tap the cog icon and then go to trash bin, you can select the page/planner you want to restore and then recover. It will go directly to the place it was when deleted.

Hooray!

Why are the stickers not importing/showing up?

Goodnotes can sometimes fail to import all images when bringing in lots of stickers. Please reimport if this occurs. Please also check you are using the correct stickers file for your version of Goodnotes 4/5 as different formats will not work.

Hopefully our GoodNotes troubleshooting guide has helped you resolve your issue but, if not, send us a comment below, contact us by email or message us on Etsy.

Goodnotes can’t change font color?

Goodnotes has functionality to allow you to change the color of the font or pen when adding text to your digital planner. If you are looking to change the font color of text, you can do this by:

– drawing around the text you wish to change color with the lasso tool
– tap inside the circle
– tap “Color”
– select the color you would like to use.

Goodnotes can’t add a page?

Goodnotes allows you to add pages to your planner to take additional notes or to include template pages. If you need to add a page to the planner, you can do this by tapping the add page tool in the top right of Goodnotes (a paper shape with + icon inside). You will then be giving the choice of adding the current template you are on or you can select a different Goodnotes template or document.

If you are looking to copy/paste another page in the planner, you can do this instead by going to the pages section by tapping the 4 squares icon in the top left. You can then tap “Select” and then choose the pages you wish to copy.